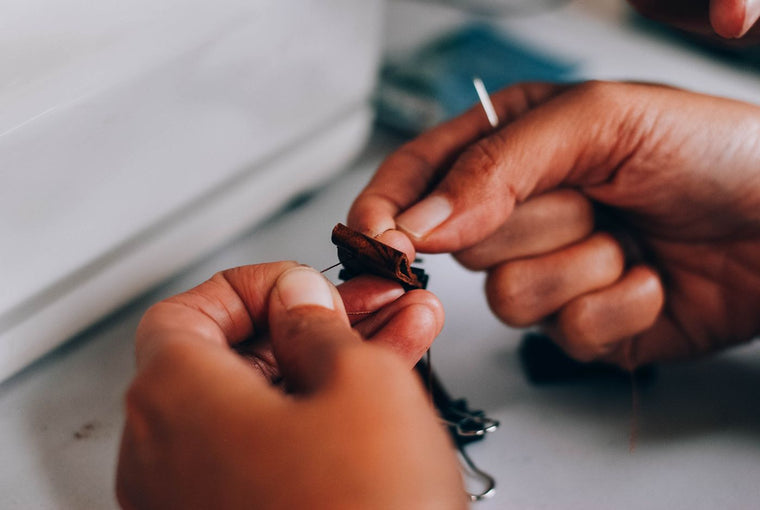
A needle eye has a remarkable talent for looking perfectly roomy until the thread arrives. To thread a sewing needle by hand, cut a fresh thread end, hold it close to the tip, place the needle against a bright contrasting background, and push the thread through the eye. Pull through a short tail, then choose a single or double strand and knot it to suit the job.
That is the whole job in miniature. The details below make it faster, reduce tangles and help the thread stay in the needle once you begin sewing.
STI Ideal Threads has supplied sewing thread since 1999, with thousands of colours and over 60 million spools sold. Its 40/2 polyester sewing thread is a practical option for many everyday hand-sewn repairs, alterations and garment tasks where a fine sewing thread is appropriate.
What You Need
Gather four simple things:
- A hand-sewing needle suited to your fabric and thread
- Sewing thread
- Sharp scissors or thread snips
- Good light
A wire-loop needle threader is optional but extremely useful. A plain piece of light or dark card also helps: choose whichever colour makes the needle eye and thread easier to see.
Before you start, check that the needle is straight, smooth and free from rust. A damaged eye can fray thread. The thread should also pass through the eye without being squeezed so tightly that it rubs or separates.
How to Thread a Sewing Needle in 6 Steps
1. Choose a Suitable Needle and Thread
Use a needle that is fine enough to pass through the fabric without leaving an unnecessary hole, but with an eye large enough for the thread. For an everyday woven garment repair, a sharp hand-sewing needle and a fine sewing thread are usually a sensible pairing.
If the thread will not pass through the eye after several clean attempts, do not make the same frayed end fight the same tiny opening all afternoon. Recut the thread, then try a needle with a slightly larger eye if needed.
2. Cut a Manageable Length
Cut roughly 45 to 50 centimetres of thread for most small hand-sewing jobs. A piece around the distance from your fingertips to your elbow is an easy guide.
Longer thread may appear efficient, but it tangles, twists and wears as it repeatedly passes through the fabric. It is usually quicker to rethread once than to spend ten minutes negotiating a knot that has developed opinions.
3. Make a Clean, Fresh Cut
Use sharp scissors to cut the end cleanly. If the end is fuzzy, flattened or split, trim off a few millimetres and start again.
Some tutorials recommend a slight angle; others favour a clean square cut. Either can work when the scissors are sharp. The important point is to create one compact end rather than a soft spray of fibres.
Avoid relying on saliva to stiffen the thread. It can be unhygienic when sewing for someone else, and a damp needle stored carelessly may be more prone to corrosion. If the end needs control, recut it or use a needle threader.
4. Improve the Light and Background
Hold the needle so the eye is clearly visible. Place a contrasting surface behind it: white card behind dark thread, or dark card behind pale thread. Face a window or use a focused work light.
Bring the thread and needle towards each other at a comfortable height. Trying to thread a needle low in your lap invites poor posture and mysterious misses.
5. Pinch the Thread Close to the End
Pinch the thread between your thumb and forefinger so only 2 to 3 millimetres extend beyond your fingertips. A short exposed end bends less than a long one.
Keep the thread still and move the needle eye onto it, or keep the needle still and move the thread through. Use whichever gives you better control. Push the end through until you can grasp it on the other side.
6. Pull Through a Tail and Prepare to Sew
Pull 10 to 15 centimetres through the eye for a single-thread setup. Keep that short tail from slipping out as you sew.
For a doubled thread, bring the two ends together and knot them. For a single thread, knot only the long working end. The right setup depends on the repair, fabric and stitch.
How to Use a Needle Threader
A basic wire-loop needle threader turns the tiny needle eye into a much larger target:
- Push the wire loop through the needle eye.
- Pass the thread through the wire loop.
- Pull the threader gently back through the needle.
- Remove the thread from the loop and leave a useful tail.
Pull straight and gently. The fine wire can bend or break if it is forced through an eye that is too small for the combined thread and loop.
Self-threading needles are another option. They have a small slot that lets you press the thread into the eye. They can help people with limited vision or dexterity, although the thread may slip from the slot more easily during some stitches.
Should You Use a Single or Double Thread?
Use a single thread when you want a finer, less bulky line of stitching. It is often suitable for hemming, basting, slip stitching and other neat work on lighter fabrics.
Use a doubled thread when the job benefits from two strands working together, such as sewing on a button or making a small general repair. Doubled thread can be easier to manage because both ends are secured in the knot, but it creates a thicker stitch.
Thread strength is not the only consideration. The fabric, needle, stitch length and stress on the repaired area all matter. Delicate fabric can pucker or show holes if the needle and thread are too heavy. A high-stress or specialist repair may need a different thread, needle or construction method.
How to Knot Thread for Hand Sewing
For a simple end knot:
- Hold the thread end between your thumb and forefinger.
- Make a small loop near the end.
- Pass the end through the loop.
- Slide the knot towards the end and pull it firm.
Keep the knot small enough to remain unobtrusive but large enough not to pull through the fabric. For doubled thread, align the two cut ends and tie them together.
Not every hand-sewing technique begins with a knot. Tailoring, embroidery and some fine-finishing methods may secure thread with small backstitches or by weaving the tail through existing stitches. For a straightforward home repair, a tidy end knot is an accessible place to begin.
Why the Thread Keeps Missing the Needle Eye
If threading is taking more than a few tries, identify the problem instead of repeating the same movement.
The Thread End Is Frayed
Trim it with sharp scissors. Do not keep pushing a damaged end at the eye; each miss separates it further.
The Needle Eye Is Too Small
Move to a needle with a slightly larger eye while keeping the needle suitable for the fabric. Thread that scrapes through the eye can fray during sewing.
Too Much Thread Is Exposed
Pinch closer to the end. Two or three millimetres are easier to steer than a waving centimetre.
The Light Is Poor
Add direct light and a contrasting background. This is often more effective than squinting harder.
The Needle Eye Is Damaged
Discard a needle with a rough, bent or corroded eye. Needles are tools, not heirlooms that must be defended at every family gathering.
Your Hands Need More Support
Rest your elbows or forearms on a table. Use a needle threader, magnifier or self-threading needle if that makes sewing more comfortable. These are sensible tools, not shortcuts.
Choosing Thread Colour for a Hand-Sewn Repair
If the stitches should blend in, unwind a single strand and lay it across the fabric in natural light. Judge the strand rather than the wrapped spool, which can look deeper and more saturated.
For a solid fabric, compare close shades directly on the garment. If the repair crosses a print, match the dominant background colour or the colour covering most of the stitch path. Decorative mending is different: choose a deliberate contrast and let the stitching show.
STI Ideal offers thousands of colours. Its fabric photo colour matcher can help you find the closest available STI Ideal shade, although screens, cameras, lighting, texture and dye lots can affect how colour appears. Test a few stitches in a hidden area before committing to a visible repair.
If you regularly mend similar colours, a small planned set is more useful than a random drawer. You can build a Custom Thread Box with 10 spools of 40/2 polyester sewing thread. Each spool contains 400 yards, approximately 366 metres, and you can choose one shade or mix up to five colours in a box.
Common Needle-Threading Mistakes
- Using blunt scissors and beginning with a fuzzy thread end
- Choosing an eye too small for the thread
- Cutting an unnecessarily long piece that tangles
- Leaving too much thread beyond the fingertips while aiming
- Working against a background that hides the eye
- Pulling a needle threader sideways or forcing it
- Using a doubled strand when the fabric needs a finer single strand
- Skipping a test stitch before a visible repair
The setup takes less than a minute. That minute usually saves thread, fabric and temper.
A Simple Hand-Sewing Setup to Keep Ready
For quick buttons, hems and small repairs, keep a compact kit with:
- Several sharp hand-sewing needles in useful sizes
- A wire-loop needle threader
- Small sharp scissors
- Pins or clips
- A thimble
- A few thread colours matched to your wardrobe
Black, soft white, grey, navy, beige and a useful brown cover many wardrobes, but choose colours based on what you actually own and sew. If you need a closer shade, use the fabric photo colour matcher as a starting point.
For machine projects, see how to choose thread for a sewing machine or follow the separate guide to thread a sewing machine.
Frequently asked questions
What is the easiest way to thread a sewing needle?
Cut a fresh thread end, pinch it so only 2 to 3 millimetres show, place the needle against a contrasting background and guide the eye over the thread. If that is uncomfortable, use a wire-loop needle threader.
How long should thread be for hand sewing?
About 45 to 50 centimetres is manageable for many small repairs. Very long thread is more likely to twist, wear and tangle as it passes through the fabric.
Should I cut thread straight or at an angle?
Both methods can work. Sharp scissors and a compact, unfrayed end matter more than the exact angle. If the first cut spreads the fibres, trim it again.
Why does my thread split when I put it through the needle?
The end may be frayed, the scissors may be blunt, or the needle eye may be too small or rough. Make a fresh cut and inspect the eye; if necessary, choose a slightly larger suitable needle.
Do I knot one end or both ends of the thread?
For single-thread sewing, knot the long working end and leave the short tail free. For doubled-thread sewing, bring both ends together and knot them as one.
Can sewing-machine thread be used for hand sewing?
Yes, a fine everyday sewing thread can be used for many hand-sewn repairs, hems and buttons when it suits the fabric and task. Specialist embroidery, upholstery or heavy repairs may require another thread type.
How do I stop the thread coming out of the needle?
Leave a 10 to 15-centimetre tail, hold it briefly as you start and avoid pulling the needle farther than the working thread on each stitch. A doubled-thread setup also prevents one end from slipping free.
Build your box
When you know what your fabric needs, you can build a custom thread box to match — 10 spools in one shade or a mix of up to five, from thousands of colours in 40/2 polyester. New to choosing thread? Start with choosing the right thread for your project or thread weights explained, or browse the full range in our catalogue.