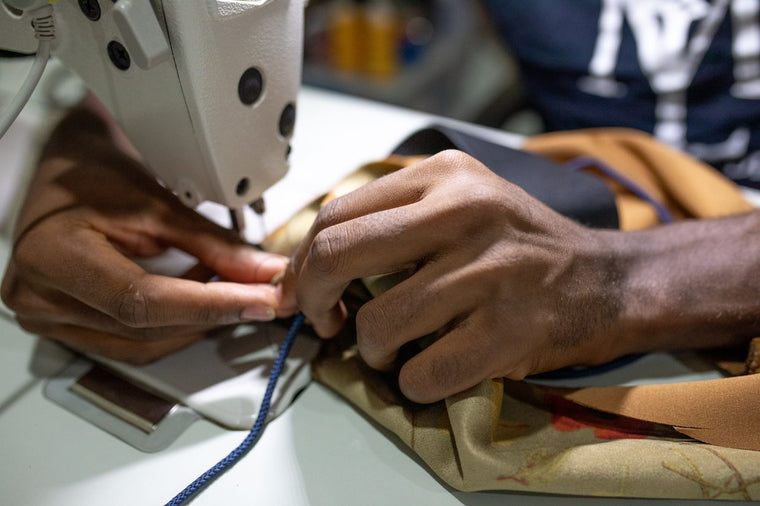
Threading a sewing machine can look like a tiny obstacle course designed by someone with strong opinions about hooks. The route becomes much easier once you know the order: raise the presser foot and needle, guide the upper thread from the spool through the tension path and take-up lever, thread the needle, insert the bobbin, then bring up the bobbin thread.
The exact path varies by machine, so keep your model manual beside you and follow its numbered arrows where they differ from this guide. Before you begin, switch the machine off or disconnect the foot control so an accidental press cannot move the needle while your fingers are nearby.
What you need before threading
Gather these first:
- Your sewing machine manual or the model-specific threading diagram
- A suitable spool of sewing thread
- The correct bobbin for your machine
- A correctly fitted, undamaged needle
- Small scissors or thread snips
- A scrap of the project fabric for a test seam
Use a smooth, sound thread that suits the needle and fabric. Old, brittle or very fuzzy thread can break or shed lint, which makes a threading problem harder to diagnose. If you need help with that choice, start with our guide to choosing thread for a sewing machine.
How to thread a sewing machine step by step
These steps describe the common path on a domestic lockstitch machine. Your spool position, bobbin direction, needle-threading direction or final guide may differ, so the manual always wins.
1. Switch off and raise the presser foot
Switch off the machine before working near the needle. Raise the presser foot with its lever.
This is not just for extra room. On many machines, raising the presser foot opens the tension discs so the upper thread can sit between them. Threading with the foot down can leave the thread outside the tension system and cause loose loops underneath the fabric.
2. Raise the needle and take-up lever
Turn the handwheel towards you until the needle reaches its highest position. The take-up lever should also rise where you can see or access it. Some electronic machines have a needle-position button; use the method stated in the manual.
If the take-up lever is low and hidden, it is easy to miss. The machine remembers every skipped guide, even when we would prefer it did not.
3. Fit the spool correctly
Place the thread spool on the vertical or horizontal spool pin. If the machine uses a horizontal pin, fit a correctly sized spool cap without trapping the thread. Check that the thread can unwind smoothly and is not catching on a notch in the spool.
4. Follow the first guide and tension path
Pull the thread through the first guide at the top of the machine, then follow the printed arrows or channels down towards the tension area. Hold the thread lightly on both sides of the channel so it slips into the path rather than resting on top.
Brother’s model-specific guidance also stresses raising the presser foot and needle before following the upper thread route. Use your own manufacturer’s instructions for the precise guide order.
5. Thread the take-up lever
Bring the thread back up through or around the take-up lever exactly as the machine diagram shows, usually from right to left, then lead it down again towards the needle. Gently pull the thread to confirm it is secure in the lever.
The common upper route is:
Spool → top guide → tension path → take-up lever → lower guides → needle
6. Use every lower thread guide
Pass the thread through the guides above the needle, including the small needle-bar guide. This last little hook is easy to miss and can lead to shredding, breakage or an unstable thread path.
7. Thread the sewing machine needle
Trim a frayed thread end. Thread the needle in the direction specified by the manual—often front to back on modern domestic machines, but not universally. If your machine has a built-in needle threader, follow its instructions and make sure the needle is fully raised first.
Pull through a tail of about 10–15 cm and guide it under the presser foot towards the back.
8. Insert the bobbin correctly
Wind the bobbin evenly using your machine’s bobbin-winding route. Do not guess the direction in which it should unwind: drop-in and front-loading systems differ, and even similar-looking machines may use a different orientation.
- Top-loading bobbin: place it in the bobbin well and draw the thread through the marked slot and tension path.
- Front-loading bobbin: place it in its removable case, pull the thread through the case slot and under its tension spring, then click the case securely into place.
Use only the correct bobbin type for your model. A nearly-right bobbin is still wrong enough to cause trouble.
9. Bring up the bobbin thread and test
Hold the upper thread tail lightly. Turn the handwheel towards you for one full needle cycle. As the needle returns to its highest point, pull the upper thread gently to lift a loop of bobbin thread through the needle plate. Draw both tails under the presser foot and towards the back.
Some modern drop-in systems do not require the bobbin thread to be raised manually; check your manual. Lower the presser foot and sew a test line on a folded scrap of the project fabric. Start slowly and examine both sides of the seam before sewing the actual project.
Quick threading checklist
Before pressing the foot control, confirm:
- Presser foot was up while threading and is down for sewing
- Needle and take-up lever were at their highest point
- Thread followed every numbered guide
- Take-up lever and needle-bar guide were not skipped
- Spool cap and bobbin match the machine
- Bobbin is inserted in the stated direction
- Both thread tails are positioned as the manual directs
- A test seam looks balanced on both sides
Why is the thread bunching underneath the fabric?
Loops or a “bird’s nest” underneath usually point to the upper thread path, not necessarily the bobbin. Remove the upper thread and rethread from the beginning with the presser foot raised and take-up lever high. Make sure the thread seats in the tension discs and passes through the take-up lever.
Do not start by turning the tension dial dramatically. Correct the thread path first, then test with the machine’s normal setting.
Common sewing machine threading problems
Loops underneath the fabric
- Likely check
- Upper thread missed the tension path
- Practical next step
- Rethread with the presser foot raised
Thread breaks near the needle
- Likely check
- Missed guide, burr, wrong needle or tight tension
- Practical next step
- Rethread, change the needle and inspect the path
Skipped stitches
- Likely check
- Needle is dull, bent, loose or unsuitable
- Practical next step
- Fit a fresh compatible needle and retest
Bobbin thread will not come up
- Likely check
- Bobbin orientation or insertion may be wrong
- Practical next step
- Reinsert it exactly as the manual shows
Thread catches at the spool
- Likely check
- Spool cap or spool position is unsuitable
- Practical next step
- Refit the spool and correct cap size
Stitches look uneven
- Likely check
- Thread path, bobbin winding, needle or tension may be involved
- Practical next step
- Rethread both paths and test on project fabric
If careful rethreading, a fresh compatible needle and the default tension do not solve the problem, stop sewing and consult the manual or a qualified machine technician. Continuing through repeated jams can make the problem harder to inspect.
Choosing thread after the machine is threaded
Correct threading cannot make an unsuitable thread-and-needle combination behave perfectly. Match thread, needle and fabric as a system, then test before committing to a visible seam.
STI Ideal’s 40/2 polyester sewing thread is a practical option for many everyday machine-sewing projects when paired with a suitable needle, fabric and settings. For a plain-English explanation of the label, see what 40/2 polyester thread means.
Colour matters too. For seams meant to blend, compare the thread with the fabric in natural light and choose the closest available shade. Visible topstitching can use either a close match or an intentional contrast; decide before winding the bobbin, because future you will appreciate the planning.
Frequently asked questions
Do you thread a sewing machine with the presser foot up or down?
Thread the upper path with the presser foot up. On many domestic machines this opens the tension discs so the thread can seat correctly. Lower the presser foot before sewing.
Should the needle be up when threading a sewing machine?
Yes. Raise the needle and take-up lever fully before threading, unless your manual states otherwise. This exposes the complete upper path and helps prevent you from missing the take-up lever.
Which direction should I thread the sewing machine needle?
Follow your model manual. Many modern domestic machines thread front to back, but some machines use another direction. The position of the needle groove and scarf is model-dependent, so do not force the thread based on a generic diagram.
How do I know which way the bobbin goes in?
Use the diagram on the bobbin cover or the machine manual. Top-loading and front-loading systems differ, and the correct unwinding direction is important for the bobbin tension path.
Why does my sewing machine keep unthreading when I start?
The upper tail may be too short, the take-up lever may not be at its highest point, or the tails may not be positioned correctly. Leave a 10–15 cm tail, complete one handwheel cycle and hold the tails lightly for the first few stitches if your manual recommends it.
Can I use the same thread in the needle and bobbin?
For many everyday seams, using the same general-purpose thread type and colour in both positions is a simple starting point. Decorative, embroidery and specialised techniques may use different combinations, so follow the project and machine guidance.
Do all sewing machines thread the same way?
No. Most domestic machines share the spool-to-guide-to-tension-to-take-up-lever-to-needle sequence, but bobbin systems, guide locations and needle directions vary. Use this guide for the logic and your manual for the exact route.
Build your box
When you know what your machine and fabric need, you can build a custom sewing machine thread box — 10 spools in one shade or a mix of up to five, from thousands of colours in 40/2 polyester. New to choosing thread? Start with choosing the right thread for your project or thread weights explained, or browse the full range in our catalogue.