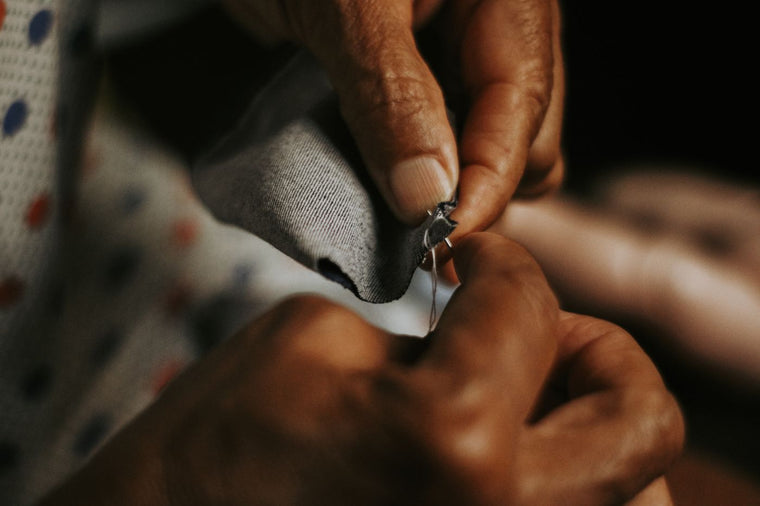
Thread, needle, fabric—and suddenly the tiny tear has become a committee meeting. The good news is that learning how to sew with needle and thread only requires a few basic steps: choose suitable tools, thread and knot the needle, use the right stitch, keep the tension even, and secure the thread when you finish.
You do not need a sewing machine to repair a small split seam, attach a patch, close an opening or practise a neat line of stitches. Start on a scrap of woven fabric, work slowly, and aim for consistent stitches rather than perfect ones. Neatness arrives after your hands learn the movement.
What you need to sew by hand
A small hand-sewing kit is enough for most beginner repairs:
- A sharp hand-sewing needle suited to the fabric
- Sewing thread in a suitable fibre, weight and colour
- Small, sharp scissors or thread snips
- Pins or sewing clips
- A thimble, especially for firm or layered fabric
- Tailor's chalk or a removable fabric marker when you need a guide
- A scrap of similar fabric for testing
Choose a fine needle for lightweight fabric and a slightly larger, stronger needle for medium-weight fabric. The needle should pass through without leaving a large visible hole. Avoid forcing a blunt or bent needle; fabric remembers rough treatment even when we would prefer it not to.
For many everyday garment repairs, alterations and craft projects, an all-purpose polyester sewing thread is a practical option. STI Ideal supplies 40/2 polyester sewing thread on 400-yard spools, approximately 366 metres each. Match the thread to the fabric area where the stitches will show. If two colours are close, the slightly darker shade often blends more quietly than a lighter one.
How to sew with needle and thread step by step
1. Prepare the fabric
Check what needs to be joined. For a split seam, turn the item inside out and align the original seam edges. For a hem, fold and press the fabric to the required depth. For a patch, trim loose fibres and place the patch so it covers sound fabric around the damaged area.
Smooth the fabric without stretching it. Pin or clip the layers so they cannot slide. If a straight line matters, mark a light guide with removable fabric chalk.
2. Cut a manageable length of thread
Use a length from your fingertips to roughly your elbow—about 45 to 60 cm is comfortable for many people. A very long strand may look efficient, but it tangles, twists and wears as it repeatedly passes through the fabric. Future you will not thank present you for wrestling a metre-long knot.
Cut the thread cleanly with sharp scissors. A crisp end is easier to pass through the needle eye than a fuzzy one.
3. Thread the needle
Hold the needle so the eye is easy to see. Bring the freshly cut thread end to the eye and push it through. Pull through a short tail if sewing with a single thread, or bring both ends together if you need a doubled thread for a small robust repair.
Single thread produces less bulk and is suitable for many hems, fine fabrics and visible finishing. Doubled thread is easier for beginners to keep in the needle and can suit buttons or small repairs, but it creates a thicker stitch. For a detailed threading method, see our guide to thread a sewing needle by hand.
4. Tie a small knot
For a single thread, knot the long end. For doubled thread, knot both ends together. Make a small overhand knot close to the end and pull it firm. A second knot in the same place can help if the fabric weave is open, but avoid a bulky knot that leaves a bump.
You can also anchor thread without a knot by taking two or three tiny stitches in the seam allowance. This is useful when both sides may be seen or when you want a flatter finish.
5. Bring the needle up from the hidden side
Start from the wrong side of the fabric or inside the fold so the knot is concealed. Push the needle through to the right side and pull until the knot rests against the fabric. Do not yank it through; that can enlarge the hole or pull a small knot through an open weave.
6. Sew the chosen stitch
For a running stitch, move the needle down and up through the fabric at regular intervals, creating a dashed line. For a stronger seam, use backstitch: bring the needle up one stitch length ahead, go back into the end of the previous stitch, then come up one stitch length beyond the new position.
Pull each stitch until the thread lies flat. The fabric should not pucker. Keep the layers supported in your non-dominant hand and guide the needle with your dominant hand. A thimble on the finger behind the needle can help you push through firmer cloth.
7. Check the tension as you go
After every few stitches, let the fabric relax. If it gathers when it should lie flat, the thread is too tight. Ease the last stitch before continuing. If loops sit on the surface, pull the working thread gently until they disappear.
Even tension matters more than speed. A calm line of slightly imperfect stitches is usually stronger and neater than a hurried line pulled tight enough to negotiate with the fabric.
8. Secure the final stitch
Finish on the wrong side. Take a tiny stitch close to the last one, but do not pull the loop closed. Pass the needle through the loop once or twice, then pull the knot down against the fabric. For a seam allowance, two or three tiny backstitches can also secure the end.
Trim the tail, leaving a few millimetres rather than cutting directly against the knot. Turn the work over and check that the seam lies flat and the visible stitches suit the repair.
Which hand stitch should you use?
The best stitch depends on what the fabric needs to do. You do not need to learn every decorative stitch before repairing a hem.
| Stitch | Best for | What to know |
|---|---|---|
| Running stitch | Basting, gathering, light seams and practice | Fast and simple, but not the strongest choice for a stressed seam |
| Backstitch | Firm seams and durable repairs | Slower, with a nearly continuous line that holds well |
| Whipstitch | Joining or protecting fabric edges | Wraps over an edge; useful for felt and simple patches |
| Slip stitch | Closing folded openings and discreet finishing | Small stitches can be hidden in the folds |
| Hem stitch | Securing a folded hem | Pick up only a few fabric threads to keep the outside discreet |
The accessible top guides agree on running stitch as the easiest starting point and backstitch as the stronger construction stitch. Learn those two first. Add slip stitch when you want to close a lining or folded opening neatly, and whipstitch when working around an edge.
Running stitch for practice and light work
Bring the needle up, move forward a short distance, push it down, then bring it up again the same distance ahead. Try to keep the spaces and stitches similar in length. You can load several small stitches onto the needle before pulling it through, but beginners often get better control by making one stitch at a time.
Backstitch for a stronger seam
Bring the needle up one stitch length from the starting point. Go backwards into the start, then bring the needle up one stitch length ahead of the first exit point. Continue by placing each new backward stitch into the end of the previous one. From the right side, the line should look almost continuous.
Slip stitch for a discreet closure
Fold both raw edges inward. Bring the needle out through one fold, take a tiny horizontal bite from the opposite fold, then return to the first side. Alternate sides while keeping most of the thread hidden inside the folds. This works well for closing cushion openings, linings and small turned projects.
How to keep hand sewing neat
Good hand sewing is mostly a collection of small habits:
- Practise on a scrap. Test the needle, thread colour, stitch length and tension before working on the item.
- Use good light. It helps you follow the fabric weave and place consistent stitches.
- Mark a guide. A removable line is useful when the fabric has no clear stripe or weave to follow.
- Keep the thread short. Replace worn or fuzzy thread instead of pulling it through more fabric.
- Let the needle lead. Push it through at a consistent angle rather than twisting the fabric around it.
- Pause to untwist. Let the needle hang occasionally so the thread can unwind.
- Press when appropriate. A pressed fold or finished seam usually looks more deliberate.
Colour also affects how neat a repair appears. For discreet stitching, compare shades in natural light against the exact part of the fabric being sewn. Patterned fabric may need a colour that blends with the background or the most visible motif. STI Ideal's fabric photo colour matcher can suggest the closest available shade from thousands of colours, although screens, lighting and dye lots mean it should be treated as guidance rather than an exact match.
Simple repairs to practise
Close a split seam
Turn the garment inside out, align the original seam line and pin it. Begin 1 to 2 cm before the split, backstitch across the opening, and continue 1 to 2 cm into the sound seam. Secure the thread and check the right side before trimming loose fibres.
Repair a small fallen hem
Press the hem back into place. Use a hem stitch or small slip stitches, catching only a few threads from the garment fabric so the outside marks remain discreet. Avoid pulling tight enough to create dimples.
Attach a simple patch
Place the patch over stable fabric beyond the damaged area. Pin it flat, then use small running stitches, backstitches or whipstitches depending on the patch style and required strength. A contrasting colour makes the mend visible; a close shade helps it recede.
Close a turned opening
Fold the seam allowances inward and press them. Use slip stitch, alternating between the two folded edges. Pull every few stitches so the opening closes without puckering.
Common beginner problems
The thread keeps tangling
Shorten the thread, let the needle dangle to remove twist, and pull each stitch through fully before starting the next. If the strand has become fuzzy or kinked, replace it.
The fabric puckers
Your tension is probably too tight, or the stitches may be too large for the fabric. Ease the thread, shorten the stitch and support the fabric instead of stretching it while sewing.
The stitches look uneven
Mark a guide and use the fabric weave as a ruler. Practise with a contrasting thread on scrap fabric first; it makes spacing easy to see. Consistency improves through repetition, not through glaring sternly at the first six stitches.
The knot pulls through the fabric
Use a slightly larger knot, anchor with tiny stitches in the seam allowance, or begin between layers. Very open or delicate fabrics may need a different anchoring method to avoid damage.
The needle is difficult to push through
Check that it is sharp, straight and appropriate for the material. Reduce the number of layers, use a thimble, or choose a suitable larger needle. Do not force a needle toward your fingers.
Choosing thread for hand sewing
Match the thread to the job rather than choosing by colour alone. Consider the fabric weight, stitch purpose, desired visibility and care requirements. A fine everyday thread suits many garments and repairs, while specialist work may require a different fibre, finish or weight.
STI Ideal Threads has supplied sewing thread since 1999, and you can browse thousands of colours across the range. Each Custom Thread Box contains 10 spools of 400-yard 40/2 polyester sewing thread. You can choose one shade or mix up to five colours, which is useful for keeping common repair colours and current project shades together.
For hand sewing, cut only the amount you need from the spool and test it on scrap fabric. If the task involves heavy upholstery, leather, very heavy denim or another specialist material, check whether a dedicated needle and heavier speciality thread are required. If you are moving from hand sewing to a machine, read how to choose thread for machine sewing.
Frequently asked questions
What is the easiest hand-sewing stitch for beginners?
Running stitch is usually the easiest because the needle simply travels up and down through the fabric. It is useful for practice, basting and light work. Learn backstitch next when you need a stronger seam.
Should I use single or double thread for hand sewing?
Single thread creates less bulk and suits many hems, fine fabrics and finishing tasks. Double thread stays in the needle easily and can add thickness for a small robust repair or button, but it is not necessary for every job.
How long should hand-sewing thread be?
About 45 to 60 cm is manageable for most beginner sewing. Longer strands tend to twist, tangle and wear before you reach the end.
How do I stop hand sewing from puckering?
Do not pull the thread tight after each stitch. Let it lie flat, check the fabric every few stitches, and loosen the most recent stitch if the fabric begins to gather.
Is running stitch strong enough for a seam?
Running stitch can hold light or temporary work, but backstitch is generally a better choice for a seam that will be stressed. Use short, even backstitches and extend the repair into the sound seam at both ends.
Can I mend clothes without a sewing machine?
Yes. Small split seams, loose hems, buttons, patches and turned openings can often be repaired by hand. Choose the stitch according to the repair and test the method on similar scrap fabric where possible.
How do I finish hand sewing so it does not unravel?
On the wrong side, take a tiny stitch, pass the needle through the open loop once or twice, and pull the knot down gently. Tiny backstitches in a hidden seam allowance can also secure the thread.
Build your box
When you know what your fabric and project need, you can build a custom thread box — 10 spools in one shade or a mix of up to five, from thousands of colours in 40/2 polyester. New to choosing thread? Start with choosing the right thread for your project or thread weights explained, or browse the full range in our catalogue.