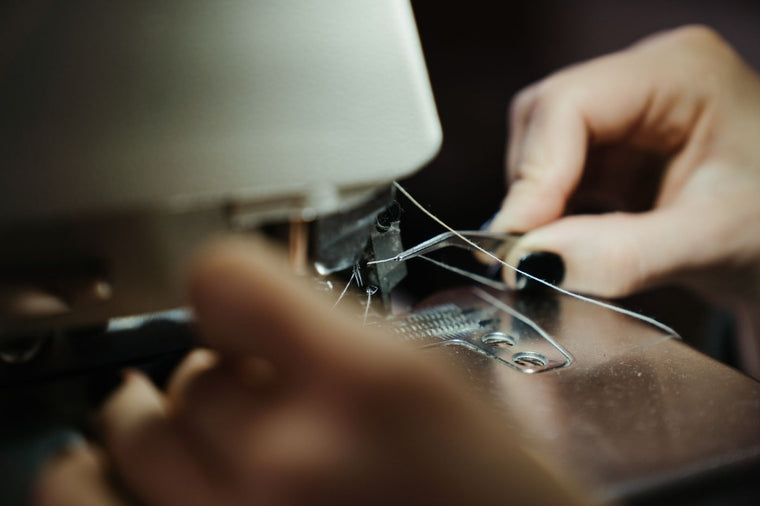
Thread tension is one of those sewing problems that makes everyone briefly consider blaming the chair. For most sewing machine thread tension issues, start by rethreading the machine with the presser foot raised, checking the bobbin, changing the needle, and testing on a fabric scrap before turning the tension dial. If loops show on the underside, the upper thread is often too loose or incorrectly threaded. If bobbin thread shows on top, the upper tension may be too tight or the bobbin may be threaded incorrectly.
The good news: tension is not magic. It is the balance between the top thread and bobbin thread so the stitch locks neatly inside the fabric layers. Once you know what the stitch is telling you, the fix becomes much less dramatic.
STI Ideal Threads has supplied sewing thread since 1999, with thousands of colours and over 60 million spools sold. Each Custom Thread Box includes 10 spools of 400-yard, approximately 366-metre, 40/2 polyester sewing thread, so this guide focuses on practical tension checks for everyday sewing, mending, alterations, quilting, embroidery use, craft projects, and small-batch work.
Quick tension checklist
Before changing settings, work through this order:
- Raise the presser foot and rethread the upper thread.
- Check the bobbin is wound evenly and inserted the correct way.
- Make sure the thread is not catching on the spool notch, sticker, cap, or bobbin winder guide.
- Change the needle if it is bent, dull, too small, or the wrong type for the fabric.
- Use the same type and weight of thread in the top and bobbin for a simple test.
- Test on a doubled scrap of the same fabric.
- Adjust the upper tension dial in small steps only after the basics are correct.
If that sounds too simple, that is exactly why it works. Many tension problems are threading, bobbin, needle, or thread-path problems wearing a tension-problem hat.
What sewing machine thread tension means
Thread tension is the resistance placed on thread as it moves through the sewing machine. The upper thread passes through tension discs before travelling through the take-up lever and needle. The bobbin thread passes through the bobbin case or bobbin tension area. A balanced stitch forms when both threads meet and lock inside the fabric, not sitting obviously on the top or underside.
Threads Magazine explains that a higher upper-tension number increases pressure on the upper thread, while a lower number reduces that pressure. Brother's help guide gives the same practical rule: smaller numbers loosen upper tension, and larger numbers tighten it.
The aim is not to find one perfect number forever. The right tension depends on your thread, needle, fabric, stitch, and how the bobbin is feeding. A setting that behaves beautifully on cotton lawn may not behave the same way on several layers of canvas or a slippery lining fabric.
Read the stitches before you touch the dial
Look at both sides of a test seam. Do not diagnose from the top only, because tension problems like to hide underneath.
Loops or loose thread on the underside
- Likely issue
- Upper thread may be too loose or not seated in the tension discs
- First checks
- Rethread with presser foot raised, check top guides, increase upper tension gradually
Bobbin thread showing on the top
- Likely issue
- Upper tension may be too tight, or bobbin tension/threading may be wrong
- First checks
- Check bobbin direction, lower upper tension gradually
Fabric puckering along the seam
- Likely issue
- Tension may be too tight, needle may be wrong, or thread/fabric pairing may be off
- First checks
- Lower upper tension, change needle, test stitch length
Thread snapping
- Likely issue
- Thread path, needle eye, old thread, tension, or spool catching
- First checks
- Rethread, change needle, check spool, test fresh thread
Uneven stitches
- Likely issue
- Threading, bobbin winding, needle, lint, fabric feeding, or tension
- First checks
- Clean machine, rethread, rewind bobbin, test slowly
Make one change at a time. If you adjust the dial, change the needle, swap the thread, and rewind the bobbin all at once, you may fix the problem without knowing what worked. Future you deserves better evidence.
Rethread with the presser foot raised
This is the step people skip because it feels too basic. Do it anyway.
When the presser foot is raised, the upper tension discs open so the thread can sit properly between them. If you thread with the presser foot down, the thread may not seat correctly, which can create loose stitches, loops, or sudden thread drama.
Tilly and the Buttons highlights the same troubleshooting order: check the spool direction, remove spool stickers, use every thread guide, keep the thread out of the bobbin-winder guide, and confirm the bobbin is inserted properly before adjusting the tension dial.
Use your machine manual for the exact threading path. The small guide above the needle is easy to miss, and one missed guide can make an otherwise good thread behave badly.
Check the bobbin before blaming the top thread
Bobbin issues can look like upper tension issues. Check:
- The bobbin is the correct size for the machine.
- The bobbin is wound smoothly, not loose, spongy, or lumpy.
- The bobbin is inserted in the direction required by your machine.
- The thread is pulled through the bobbin case tension channel.
- No loose thread tails or lint are caught under the needle plate.
Sew School notes that incorrect threading is responsible for many tension problems and points to bobbin winding, bobbin direction, and free thread movement as key checks. That is practical advice: a messy bobbin often produces a messy stitch.
For everyday construction sewing, start with the same thread in the top and bobbin. It keeps the stitch balance easier to read. Once the machine is sewing cleanly, you can test different colours or specialty threads if the project calls for them.
Adjust upper thread tension in small steps
Once the machine is threaded correctly and the bobbin is behaving, adjust the upper tension dial if needed.
Use this rule:
- Lower number: less upper thread tension.
- Higher number: more upper thread tension.
Sew a line on a fabric scrap. If the upper thread is being pulled to the underside, increase the upper tension slightly. If the bobbin thread is being pulled to the top, lower the upper tension slightly. Move one number at a time, or smaller if your machine allows it, and test again.
Do not chase perfection on a single thin scrap if the real project has two or three layers. Test on the same fabric layers, interfacing, batting, or seam bulk that your project will actually use. Fabric has opinions, and it shares them through stitches.
Be careful with bobbin tension
Most home sewing tension adjustments should start with the upper tension dial. Bobbin tension is more delicate and is usually not the first thing to change.
Threads Magazine advises making bobbin tension screw adjustments in small increments, no more than a quarter-turn between tests. That caution matters because a tiny screw can create a big change, and some drop-in bobbin systems are not designed for casual adjustment.
Adjust bobbin tension only when:
- Your manual explains how to do it for your model.
- You have ruled out threading, needle, bobbin winding, lint, and upper tension.
- You are using a thread or technique that genuinely needs it.
- You can keep track of the original screw position.
If you are unsure, leave the bobbin tension alone and check the manual or a sewing machine technician. There is no shame in not turning the tiny screw. The tiny screw has enough confidence already.
Match needle, thread, and fabric
Tension settings cannot fix every mismatch. If the needle eye is too small for the thread, the thread can shred or snap. If the needle is too large for the fabric, the seam may pucker or leave visible holes. If the thread is too heavy for the fabric, the seam can look bulky even when the tension is technically balanced.
For many everyday sewing projects, a smooth 40/2 polyester sewing thread is a practical choice. STI Ideal's 40/2 polyester sewing thread works well for garment making, mending, alterations, quilting, embroidery use, craft projects, and small-batch sewing where an everyday thread is appropriate.
Use a fresh needle suited to the fabric:
- Universal needle for many woven everyday fabrics.
- Ballpoint or stretch needle for many knits.
- Sharp or microtex needle for some tightly woven fabrics.
- Larger needle only when the fabric and thread need it.
If the thread keeps breaking after you rethread, try a new needle before making bigger tension changes. Needles are small, but they cause large amounts of sewing-table negotiation.
Use smooth, suitable thread
Thread quality affects tension because the machine has to pull thread smoothly through guides, tension discs, the needle eye, fabric, and bobbin area. Fuzzy, brittle, uneven, or old thread can snag, shed lint, snap, or create inconsistent stitches.
Before sewing an important seam, pull a short length of thread from the spool. If it feels rough, breaks easily, or sheds heavily, test it before trusting it in the project.
STI Ideal's Custom Thread Box helps makers build a practical thread set instead of relying on mystery spools from the bottom of the drawer. Each box includes 10 spools, and you can choose one shade or mix up to five colours from thousands of colours. If colour choice is part of the problem, use the fabric photo colour matcher to find the closest available STI Ideal shade.
A simple test-seam method
Use this method when the stitch looks wrong:
- Cut two scraps from the project fabric.
- Use the same number of layers as the real seam.
- Insert a fresh needle.
- Thread the machine with the same thread in the top and bobbin.
- Set the upper tension to the manual's normal starting point.
- Sew 10-15 cm slowly.
- Check the top and underside.
- Adjust only one thing, then test again.
Keep the test strip beside the machine until the project is finished. If the stitch changes later, you can compare the new seam with the earlier good sample and spot what changed.
Common mistakes to avoid
Do not adjust tension before rethreading. Rethreading is faster and solves more problems than people expect.
Do not sew with the presser foot raised. The machine needs the foot down to control the fabric and engage tension correctly.
Do not ignore the bobbin direction. Some machines are very specific about how the bobbin should unwind.
Do not use a damaged needle and expect the tension dial to compensate.
Do not assume thread colour is only cosmetic. If the stitch is visible, colour affects how neat the seam looks. A close shade is better than a brave guess.
Do not change bobbin tension casually. Make upper tension and threading checks first.
When tension is not the real problem
Sometimes the stitch problem is not tension. Check for:
- Lint under the needle plate or around the bobbin case.
- A bent needle.
- Thread caught on a spool notch or sticker.
- The wrong presser foot for the stitch.
- Fabric being pulled from behind instead of guided gently.
- A stitch length that is too short for the fabric.
- Thread that is too old, fuzzy, or unsuitable for the needle.
If the machine suddenly starts nesting thread underneath, stop immediately. Cut the threads, remove the fabric gently, clean the bobbin area, rethread the top and bobbin, and test again. Pulling hard can bend the needle or make the problem worse.
The simple takeaway
Good sewing machine thread tension means the upper and bobbin threads lock neatly inside the fabric. Start with the basics: rethread with the presser foot raised, check the bobbin, change the needle, use suitable thread, and test on a scrap. Then adjust the upper tension dial in small steps.
If you want fewer thread variables, build a practical thread set with smooth, project-ready colours. STI Ideal's Custom Thread Box lets you choose 10 spools of 400-yard, approximately 366-metre, 40/2 polyester sewing thread from thousands of colours.
Frequently asked questions
What should sewing machine thread tension be set at?
Many machines have a normal starting range around the middle of the tension dial, but the correct setting depends on the machine, fabric, needle, thread, and stitch. Start with your manual's recommended default, sew a test seam, and adjust only if the stitch is unbalanced.
How do I know if my sewing machine tension is wrong?
Check both sides of a test seam. Loops underneath often point to loose or incorrectly threaded upper thread. Bobbin thread showing on top can mean the upper tension is too tight or the bobbin is not threaded correctly. Puckering, snapping, and uneven stitches can also involve needle, fabric, lint, or thread quality.
Should I adjust top tension or bobbin tension first?
Adjust upper thread tension first after rethreading and checking the bobbin. Bobbin tension is more delicate and should usually be changed only when the manual recommends it, the basic checks are complete, and small test adjustments are possible.
Why is my thread looping under the fabric?
Loops under the fabric often happen when the upper thread is not threaded correctly, is not seated in the tension discs, or has too little tension. Rethread with the presser foot raised, confirm every guide is used, check the needle, and test again before turning the dial.
Why is my bobbin thread showing on top?
Bobbin thread showing on top can mean the upper tension is too tight, or the bobbin thread is not feeding with enough resistance. Check that the bobbin is inserted correctly and pulled through the bobbin tension channel, then lower the upper tension slightly if needed.
Can bad thread cause tension problems?
Yes. Old, fuzzy, brittle, or uneven thread can snag, snap, shed lint, and feed inconsistently through the machine. Use smooth thread that suits the needle and fabric, and test unknown spools before using them on an important seam.
Does thread colour affect tension?
Colour does not change tension, but it affects how visible the stitch looks. A balanced stitch can still look messy if the colour stands out on the seam. Match the thread to the visible fabric area, or use STI Ideal's fabric photo colour matcher to find the closest available shade.
Build your box
When you know what your machine and fabric need, you can build a custom sewing machine thread box — 10 spools in one shade or a mix of up to five, from thousands of colours in 40/2 polyester. New to choosing thread? Start with choosing the right thread for your project or thread weights explained, or browse the full range in our catalogue.